


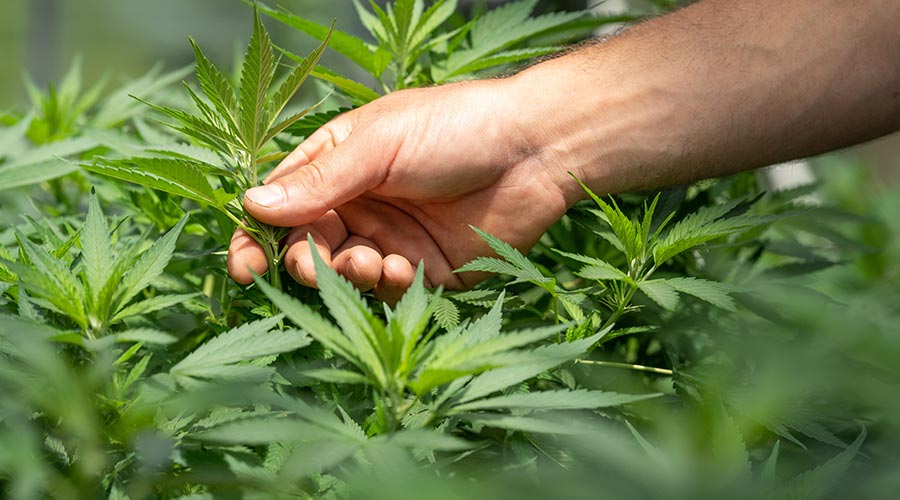
With so many different ways to grow weed indoors, it can be a bit overwhelming to find the perfect setup for your space and properly weigh all of the different pros and cons. Below we’re deep-diving into the meat and potatoes of growing marijuana indoors. Here’s everything you need to know.
What to consider before growing weed indoors
If you’re thinking about growing weed indoors, you first need to take a few things into consideration:
- Your goals with your indoor grow and how much time you have to commit to it
- Available grow space
- Skill level
- Budget
First and foremost, you need to consider what exactly you want out of your indoor grow. Growing weed is no walk in the park, so you should factor in how much time you have to invest into it, and how much weed you want to grow. Some small grows can be fully automated, even when watering. But this route can be expensive and unforeseen problems can still spring up. When growing weed, you should expect to spend at least an hour in there every day if it’s a smaller grow, and longer if you intend to look after several plants. You should also consider whether you’re getting into growing as a hobby or if you’re looking to make large quantities of your own home-grown medicine. This will help you decide how much space you need and how much time you’ll have to spend. Comparing these two ideals can help you set realistic goals.
Next, the size and complexity of your indoor grow will vary wildly based on your intended grow area. While some people successfully grow big plants in closets or in grow tents, if you want more plants, you’ll need a larger area. You may even need to modify your space in different ways, such as removing ceiling fans, removing carpeting, sealing doors, and boarding up windows to prevent light pollution. You should take great care when considering the space you’d like to grow in. While people successfully grow large crops in basements and spare bedrooms, sometimes all you really need is a grow tent. Compare your goals for your grow to pick the perfect grow space to suit your needs.
You’ll also need to do your research. Growing weed is a complex biological and agricultural science, and every strain needs different attention. If you’re a novice grower, you’ll have a much easier time going with a beginner grow, such as a simple soil grow or a simple ebb and flow hydroponics system. We’ll break down beginner and advanced grow options later. You should aim to always be learning in your garden, and at the very least, know what nutrients, humidity, and light and water requirements that weed plants need. You should also know how to diagnose and deal with problems. The Cannabis Grow Bible is a great place to start, and a great reference book for possible issues and setting up growing environments.
Last but not least, consider your budget. Indoor grows can be as simple as dirt, lights, and a cooling system, and they can still be so much more complex and streamlined. The upfront costs of setting up an indoor grow are on the higher side, so shoot for affordable options and a smaller scale at first if you must.
Are there benefits to growing weed indoors over growing outdoors?
One of the biggest considerations for any grow is where you’ll put it. While indoor grows tend to be a lot more complicated than outdoor grows, they still come with a lot of benefits on their own that you don’t see with outdoor grows. For example, indoor grows can safely operate pretty much anywhere. Whether you’re in the city or way out in the country, you can set up a cannabis grow indoors relatively easily with a slightly higher startup cost than the cost for an outdoor grow.
Further, growing weed indoors gives you full control over your plants and your growing environment. Plants grown outdoors are at nature’s mercy, including bad weather, disease, and pests. Indoor plants are in a perfect stable environment throughout the entire duration of their lifecycle, meaning you tend to avoid diseases and pests and encourage higher yields. Indoor grows can also be kept in perpetual flowering, meaning it offers a more stable supply of cannabis without having to wait for the cold season to be over to start another crop. Indoor growing can be a bit pricey to start out, but it always comes with a huge return on investment with the constant cycle of growing and harvesting.
Different types of indoor weed grows and everything you’ll need to run one
Below, we’re breaking down the different types of indoor grows and the equipment you’ll need to run them. We’ve broken them down by skill level and budget to help you make the best decision for your goals.
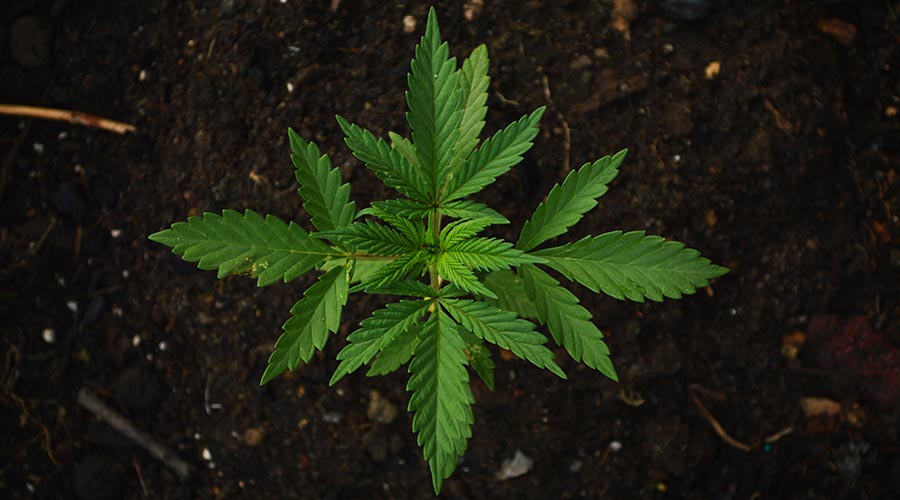
Soil
A soil grow is an indoor grow setup that uses good old-fashioned dirt to grow weed. It involves the use of pots and high-quality, nutrient-rich soils. There are 3 main types of soil grows.
- Traditional soil (Beginner, $) — A traditional soil grow uses high-quality potting soil specifically made for cannabis. These soils are organic and free of pesticides and harmful chemicals that can make you sick if you smoke the flowers. Avoid using commercial soils like miracle grow with cannabis. All you need is a few necessary materials, lights, and dirt to be efficient.
- No-till (Advanced, $$) — No-till grows are grows made with cloth pots and living soil. That means that you will reuse the same soil through every harvest, but you will need to be keen on understanding soil amendments for best results. The upfront cost is somewhat more expensive than a traditional grow, but the lifelong price is pretty affordable.
- Sea of green / Screen of green (Intermediate, $$) — Sea of green utilizes lots of little plants instead of growing a few very large plants. It helps growers grow a higher yield faster by using smaller plants and shaping them using trellis netting for optimal photosynthesis. It also requires pots and more hands-on attention.
- Drip irrigation (Beginner, $$$) — Drip irrigation soil grows utilize a drip system that helps you to automate your watering and feeding process. Every soil grow can be outfitted with a drip irrigation system, though drip irrigation systems can be a bit pricey and time consuming to figure out. This system helps keep soil evenly saturated with water to give your soil grow the best results.
To run a basic indoor soil grow, you will need:
- Lights
- Light bulbs
- Pots
- Soil
- Clones or seeds (up to 6)
- Water purifier (if you have hard water)
- Oscillating fan
- Carbon filter
- Portable AC
- Ducting
- Troubleshooting products (CO2 bags, enzymes, organic pesticides)
- Hardware (zip ties, trellis netting, watering cans and sprayers, stakes)
- Automation tools (timers, humidity/CO2/temperature readers, humidifier)
- Drip irrigation system (optional)
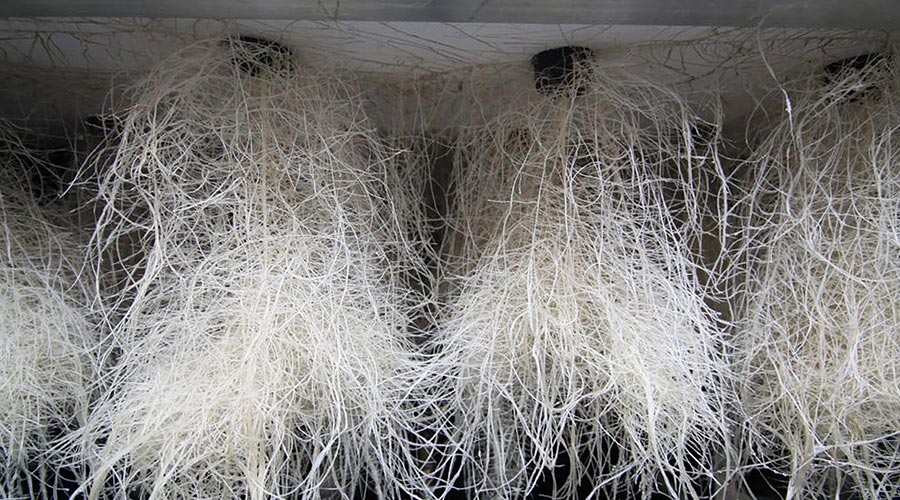
Hydroponics
A hydroponic grow is one of the easiest ways to grow weed indoors. Hydroponics use a nutrient-rich water solution to support plants in a nutrient-free substrate. They come in all different shapes and sizes and at different experience levels and price points. The nutrient solutions themselves are typically expensive upfront, but buying a large amount of nutrients at the same time will last for several harvests before you need to buy more.
- Continuous Flow (Beginner, $$) — A continuous flow system supplies cannabis plants with nutrients and water through grow trays in an all-in-one system. The plants will be placed in a nutrient-free substrate and constantly supplied with water and nutrients via tubes and an air pump. The nutrient film technique is an example of a continuous flow system, and is a great choice for beginners since the entire system is automated and all you’ll have to do as a grower is manage your plants.
- Ebb and Flow (Beginner, $$) — An ebb and flow system is similar to continuous flow except the nutrient and water solution is on a timer for a few daily feedings. In an ebb and flow system (also known as a flood and drain system), a water pump in a nutrient-rich water reservoir will flood your plant tray to saturate the substrate. Any unabsorbed nutrients will flow back into the reservoir for reuse on the next cycle. This system is relatively inexpensive and newbie-friendly.
- Wick Systems (Intermediate, $) — Wick systems involve placing plants in a nutrient-free substrate and using wicks to absorb water and nutrients from a reservoir as the plant needs them. These systems are extremely affordable and easy to set up, but they can be difficult to calibrate and operate correctly.
- Gravity Systems (Intermediate, $) — Gravity systems can be used with ebb and flow and continuous flow systems, but like wick systems, they can be difficult to set up and calibrate. In a gravity system, everything is placed at a slight slope so that gravity is used to move the nutrient solution without the use of multiple pumps. The solution will travel from the top of the slope from a reservoir through the grow medium until it ends up in a second reservoir at the bottom of the system, which will pump back into the first reservoir in a cycle.
- Drip Irrigation (Advanced, $$$) — Drip irrigation systems feed plants by pumping water and nutrients from a reservoir into individual drip lines. Each line delivers water and nutrients to the plant substrate directly, and is triggered by moisture content. Drip irrigation systems are by far the most expensive systems, and they can be difficult to calibrate initially. However, these systems are almost fully automated, meaning you won’t have to spend as much time in your garden.

To set up a basic hydroponics grow, you will need:
- Lights
- Lightbulbs
- Substrate (Rockwool, coco coir, etc)
- Clones (up to 6)
- Reservoir(s)
- Water purifier
- Air stone(s)
- Nutrient pump(s)
- Water pump(s)
- Air pump(s)
- Hoses and tubing
- Grow tray or table
- Oscillating fan
- Carbon filter
- Portable AC
- Ducting
- Troubleshooting products (CO2 bags, enzymes, organic pesticides)
- Hardware (zip ties, trellis netting, watering cans and sprayers, stakes)
- Automation tools (Timers, humidity/CO2/temperature readers, humidifier)
Aeroponics
Aeroponics are best left to professionals. They are notoriously scientific and often require daily wellness checks to ensure the system is functioning properly. Soil and hydroponics are newbie friendly, but aeroponics are a lot more technical. Plants grown aeroponically grow outside of any growing medium, and rely on careful nutrient and water misting to keep the plant healthy. While they produce massive yields, all aeroponics methods are advanced.
- Deep Water Culture (Advanced, $$$) — In a deep water culture system, air, nutrients and water are placed in a reservoir and contained system with a lid and an air pump. The system bubbles in the plant-holding container, evenly misting the nutrient and water solution onto the plants’ exposed roots a few times a day, never allowing the plants to dry out or the roots to be exposed to light. These systems are complex and difficult to set up, but they’re fully automated so they save savvy growers a lot of time.
- Aeroponics Pots (Advanced, $$$) — Aeroponics pots are contained aeroponics systems that utilize tubes, pumps, and spray nozzles to mist the roots of the plants intermittently. The reservoir is kept separate from the roots, though the plant is being misted constantly. In these grows, a lot of calibration and monitoring is required, as well as expensive equipment.
What you need for a basic aeroponics grow:
- Air stones
- Water level gauge
- Clay pebbles
- Pot or grow box (build your own)
- Nutrient pumps
- Mist nozzles
- Hose
- Nutrients
- Oscillating fan
- Carbon filter
- Portable AC
- Ducting
- Troubleshooting products (CO2 bags, enzymes, organic pesticides)
- Hardware (zip ties, trellis netting, watering cans and sprayers, stakes)
- Automation tools (timers, humidity/CO2/temperature readers, humidifier)
How to grow weed indoors
If you’re ready to start growing weed indoors, here are a few pro tips on what to do on your first run. Remember, in order to start growing, you first need to weigh your options and choose which type of indoor grow you’ll run. From there, you’ll gather all of the necessary supplies and build your grow area before you begin bringing plants into the equation. Seeds and clones are easy to come by, but making sure that you have your grow set up adequately and taking the time to test it before you bring plants into the mix will make it much easier for you to work out the kinks without messing up your plants and burning money. You should run your grow room with no plants in it for at least 2 weeks to make sure that the room doesn’t overheat or get too cold, and that your timers, lights, and fans are all working properly.
1. Set up your grow space and test the room while it’s empty
Before you do anything, start by looking at your goals and determining the type of grow and equipment you’ll need for your indoor setup. From there, you’ll source all of your materials and build out your room however you see fit. It’s best to do a dry run over a span of a week or two to ensure your system is calibrated correctly. You can run ordinary plants in there if you’d like, but it’s best to avoid cannabis at first so you can save some money and work out the kinks without harming your expensive cannabis seeds or clones.
2. Get seeds or clones and start the veg cycle
Once your room is set up, it’s time to start looking for the strains you’d like to grow. We’ve written a few articles on great strains for indoor grows as well as how to choose an ideal strain for your time constraints, skill level, and space requirements. Take great care in researching your ideal indoor strain. Once you have it, you can get started.
Start by germinating your seeds in a damp paper towel until the tap root is exposed, then place it into your growing medium. You can place clones directly into your growing medium. When vegging, you’ll shoot for 18-24 hours of light a day and ample water. It helps to veg your plants separately with fluorescent lighting, as they tend to run cooler and use less energy. You can accomplish this in a closet with a small oscillating fan, or you can veg in your main room, too. However, keeping the vegging plants separate from the main grow can help you keep your flower room in perpetual flowering by always having new plants ready to go when you finish harvesting.
The veg cycle lasts between 3-16 weeks. Your plants will stay on the same light cycle throughout this period, and you will look for signs of your plant’s gender. Male plants should be culled and removed from the room as soon as they begin displaying their gender to prevent accidental pollination and ruining your crop. Once the males are removed, take care to trim and care for your plants until they’re large enough to move into the flowering room. Once they reach a decent size, you can flip your light cycle to flowering.
3. Flip your plants into the flowering cycle
Once a plant is through vegging and large enough, it’s time to start flowering. Cannabis is an annual plant, meaning that it lives and dies in one season. To get cannabis to start flowering, the plants need to think it’s autumn and approaching the end of it’s life cycle. The plant will flower in hopes of pollinating, but in the absence of male plants, it will produce THC-rich resin glands and big sticky flowers.The flowering light cycle is 12 hours on, 12 hours off. Plants will believe that it’s autumn and begin producing their buds. Before flipping into flowering, it’s best to ensure you’ve already installed any trellis netting and trimmed, topped, and trained your plants (learn about low stress training here). By encouraging proper growth, you can encourage higher yields. Your plants will flower for 7-11 weeks and are ready to harvest when the trichomes are milky white and somewhat amber in color.
4. Cut clones and start vegging them
Before harvesting, you can cut clones for your next cycle. It’s best to cut your clones about 2-3 weeks into the flowering cycle, before your plants are full of buds. You’ll cut a branch off of your plant, and using a hormone gel, the prior leaf nodes will become root nodes. You can also stick your clones directly into the substrate, though the success rate for these clones is much lower than those who use clone gel.Once you have your clones, you can start at step two, and get them vegging. By the time you harvest your crop, the clones will have rooted and be large enough to finish vegging or even begin flowering in your main room.
5. Harvest your crop
When your flowers are larger after 7-10 weeks, they’re ready to harvest. You can harvest your flowers at their ripest by watching the trichomes with a handheld microscope. Your trichomes should change from clear to a milky white color, and are freshest when about 20% of the milky trichomes are turning amber. You can also look out for the stigma, which are the hair-like strands covering the buds. Once they turn orange and start curling in combination with the appearance of your trichomes, you’re ready to harvest.
It’s better to harvest slightly too late than too early, though. THC content is minimal in trichomes until they begin to change color. However, if they grow for too long and the majority of trichomes turn orange, you’re also losing potency. THC will begin to break down at this point from UV exposure and oxygen, turning your THC into CBN, which is a potent sleep medicine that doesn’t get you very high.
To harvest your weed, you’ll first flush your plants with only water, no nutrients, for about a week. Using a pair of pruning shears, you’ll go branch by branch and take your plant apart. If you’re wet trimming, you’ll trim the buds immediately after harvest. However, if you’re dry trimming, you’ll take branches and hang them to dry for several days before trimming.
6. Dry and cure or process your harvest
There are a lot of different ways to process your cannabis. You can either dry it and smoke the buds, or you can flash freeze it and make it into concentrates. If you’re looking to make rosin or other concentrates, you’ll cut your plants down and throw all of the materials into an oven bag. Anything that has trichomes on it should be flash frozen in a deep freezer and then taken to a professional concentrate processor for making into concentrates.
However, if you’re like most people, you’ll want to dry and smoke your buds. You’ll need to set up a drying room, which involves a drying rack, a hygrometer, an oscillating fan, and a humidifier (if you live in a dry area) or a dehumidifier (if you live in a humid area). You’ll hang your branches upside down from the rack to dry them, and once they’re dry, you’ll give them a trim. If you want to avoid having to buy all the required parts, check out WeDryer, an awesome all-in-one tool for drying your weed.
After your buds are dried and trimmed, you can cure them. The cure process is time consuming and requires close monitoring and hands on attention to do it right. If your flowers are too dry, they’ll taste like hay. If they’re too wet, they’ll grow mold and ruin your cure. To cure marijuana, you’ll store your dry buds in airtight glass jars to help preserve their flavors. Curing takes up to a month, and humidity inside the jars should stay between 55-65%. You can use humidity packs to help regulate humidity, but if your buds are wet, it helps to burp the jar a few times a day and turn your buds to prevent moisture from getting stuck and causing mold.
After you’re done curing, the buds will be shelf stable. They’re dry, but sticky and aromatic and not moldy. You can store cured buds in airtight containers outside of direct sunlight for best results.
7. Place rooted clones into the growing medium and begin again
After your harvest is complete, you can take the vegging clones from step 4 and put them into your flowering room. From there you’ll just complete these steps to keep your indoor grow in perpetual flowering and get the most bang for your buck and more weed than you’ll even know what to do with.
Final Thoughts
Ultimately, there are a lot of moving parts involved with indoor grows. If you’re looking at how to grow weed indoors, you should take great care to consider all of the options available in this guide before jumping in so that you can have a better experience with your first run and enjoy a higher quality product. While growing weed indoors comes with its own set of pros and cons and is by no means an easy feat, its a worthy hobby and a great way to grow your own medicine.


