


Have you ever wanted to learn how to roll a cross joint? If you are among the countless thousands of people who have seen the modern-day cinematic stoner classic Pineapple Express – or one of the many stoners who have watched it more than a few times – the cross joint is undoubtedly the stuff of legends.
Providing you with the unique opportunity to draw from not one, not two, but THREE burning joint tips, the cross joint represents the pinnacle of smoking satisfaction as far as modern-day stoners are concerned.
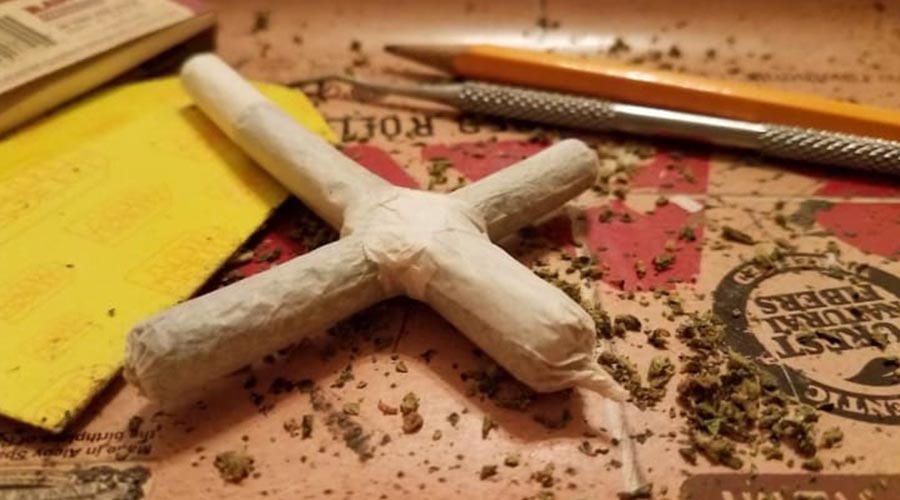
The cross joint is essentially two joints fashioned into a cross. It is comprised of a large joint with a second smaller joint running perpendicular through the first, with the first being lit as usual, and both ends of the smaller joint being lit as well. In addition to the standard single smoke stream, the user therefore gets two additional streams of smoke from the second joint.
It is debatable whether or not cross joints provide any significant benefits over traditionally-rolled joints. What can’t be denied however is that:
- a) you get a lot more smoke in the process – and consequently – get high much quicker.
- b) they are undoubtedly a lot of fun!
How to roll a cross joint: step by step guide
1. You will need to make two joints, so you will need two rolling papers initially: a large one and one that’s slightly smaller. You will also need a couple of papers for the glue strips to seal the joint when you are done.
2. Roll two joints, making sure that the larger joint is thick enough for the smaller joint to pass clean through.
3. Take a sewing needle and start to poke a hole through the larger joint about a quarter of the way down from the top. Go slow and try not to rip the joint.
4. Keep working the hole with the needle until it is just slightly big enough for the smaller joint to fit through. You will want a snug fit so don’t make the hole too big.
5. Push the smaller joint through the hole you have just made until the end comes through to the other side. You may have to work the smaller joint around a bit. Be very careful at this point and take it slow. You don’t want to ruin your cross joint this far into the process!
6. Keep pushing and rotating the smaller joint through the hole until it is clean through the hole in the larger joint. You may have to push and pull to get the smaller joint into position.
7. Once you have gotten the smaller joint pushed in where you want it to be, ease it back out and poke two small holes on either side of it, in the spot where it will be inside the larger joint. This will allow you to draw in smoke from both ends of the burning ‘crossbeam’ (the smaller joint).
8. Push the smaller joint back into position and cut out the glue strips from the other rolling papers. Use these to seal the seams between the two joints, making sure that it provides an airtight seal.
9. Try puffing at the unlit joint to ensure that it is indeed sealed tightly, and you are done! And that’s how to roll a cross joint!
Check out the video below, which shows Seth Rogen demonstrating how it’s done.


