If you’re ready to try your hand at growing your own weed, you’ll want to start by understanding how to get them to grow from seed. In order to trigger that process, you need to germinate the seeds. Here’s everything you need to know about germinating cannabis seeds along with three tried-and-true methods you can use to get started.
What is cannabis seed germination?
The very first stage of the cannabis life cycle is germination. Germination, also known as seed popping, is the process that forces a cannabis seed to stop hibernating and start growing. But in order to trigger a seed into germinating, it has to receive a few messages from its environment that let it know that it’s safe to start growing.
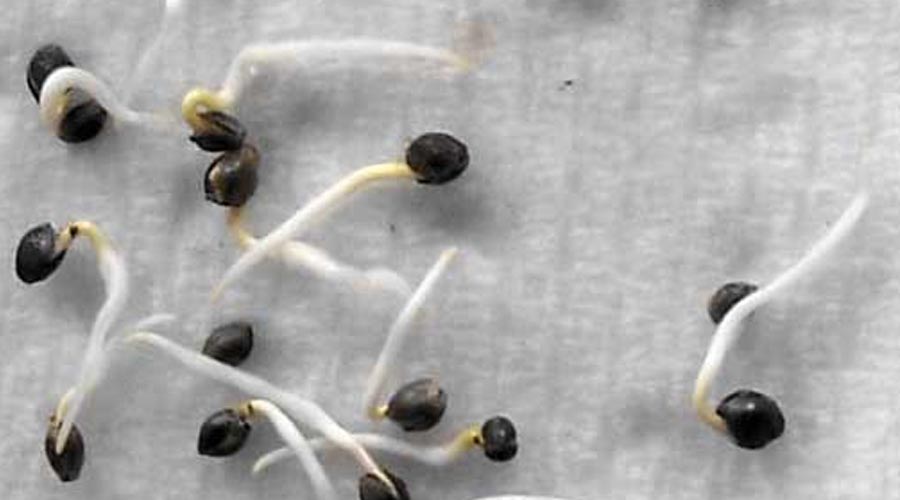
Seeds need moisture to germinate, and once they have enough of it, they’ll get bigger until they burst out of their shells and start to grow. The first thing that appears is its tap root, which helps the newborn plant absorb water and nutrients from the soil around it. After the root appears, the seed will begin growing a stem so that it can reach the sunlight and start photosyntheszing.
Before you get started
When you’re ready to start germinating cannabis seeds, the first thing you want to do is get your hands on high-quality seeds. High-quality weed seeds become strong, healthy plants— so you’ll want to avoid seeds that are soft, fresh-feeling or green as they’re not yet mature. You’ll also want to avoid pale-green, white, or very dark seeds as they might have too much trouble sprouting. Any seeds that you don’t germinate should be stored in a cool, dry place until you’re ready to pop them.
Germination is a crucial part of the growing process, so you want to give your seeds the very best shot at life. Some growers will soak seeds in 1% hydrogen peroxide or a compost tea before germinating them to help kill bacteria, pathogens, or other dangerous pests that may inhibit their growth. You will also want to consider the environment in which you’ll be growing your plants. For example, you need a setup that doesn’t require you to handle the seeds at all once you start the process. It should also hold onto moisture well and be kept at temperatures between 68-72 degrees Fahrenheit.
How to germinate cannabis seeds: three methods
There are several ways to pop cannabis seeds. The method you choose is going to come down to your personal preferences. Here are a few ways to get started.
1. Germinating cannabis seeds in a paper towel

The paper towel method really brings you back to second grade and the mung bean experiment. To germinate cannabis seeds this way, you will need:
- Paper towels
- Spray bottle
- Plastic baggy
To get started, lay your paper towel flat on your countertop, and place a few seeds on top. Then you’ll take a second paper towel and cover the seeds. The next step is to take a spray bottle and lightly mist the paper towels with water until they’re damp but not soaked. Gently move the paper towels and seeds into a plastic sandwich bag and store them in a cool dark place away from sunlight. In 2-5 days, your seeds will germinate and begin showing their roots. Once the root reaches about 5mm in length, they’re ready to plant.
You’ll want to take great care to not handle the seeds or the baggy too often. When it’s time to check on them, remove the paper towels from the bag very carefully and be gentle when moving the top paper towel. The roots can become tangled in the paper towel, especially if they grow too long. Once they’re ready, carefully transfer them root side down into your prepared soil.
2. Germinating cannabis seeds in soil


Popping seeds in soil is a natural method for germination, and the only real downside is that you can’t monitor progress and you just have to wait for them to pop out of the dirt. But at the end of the day, soil is one of the best options since it protects the fragile roots from interference. To get started, you will need:
- Seed starter potting soil with pH around 6.
- Small seedling grow cups
- Water
Start by placing about an inch of potting soil into small growing cups or pots. It’s important to use a seed starter mix since it has the right acidity and nutrients to get your seeds strong and ready to grow for the first two weeks of their lives. If you use a seed starter mix, don’t feed them any more nutrients since they’re delicate at this stage and you could kill them.
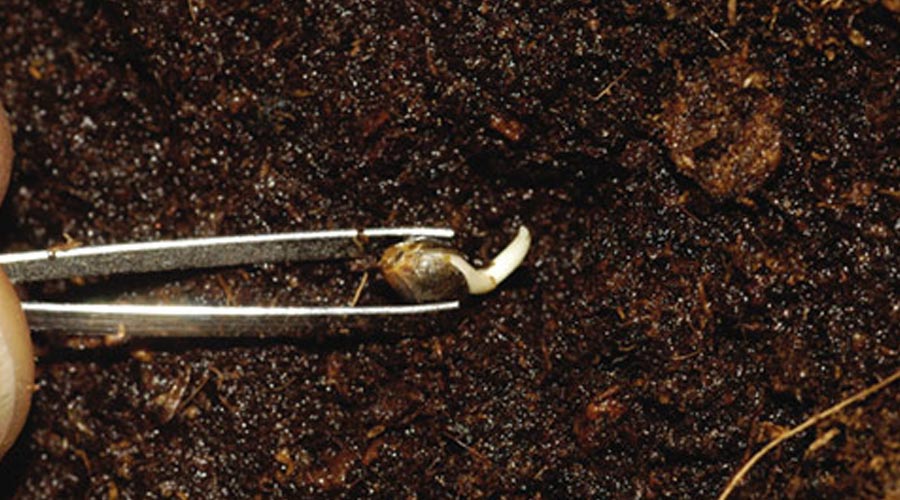
Gently moisten the soil with water. Your soil should be damp but not soaking wet. Use the tip of a pencil to push a small hole into the soil, no more than half an inch deep and cover the seed with more soil. Now that it’s planted, leave it completely alone. Store your grow cups in a cool dark place and mist with a spray bottle when the soil begins to dry out. Aim to keep their environment between 70 to 80 degrees Fahrenheit. Within 4-7 days, you should start seeing sprouts.
Once your seedlings are about 2-4” tall, you can safely transplant them into larger pots so that they can spread out and grow.
3. Germinating seeds in water


Germinating your seeds in water is faster than the soil method, but this method can go wrong in a few different ways. As long as you keep an eye on your environment, it should be relatively easy. To germinate seeds in water, you will need:
- A drinking glass
- Water
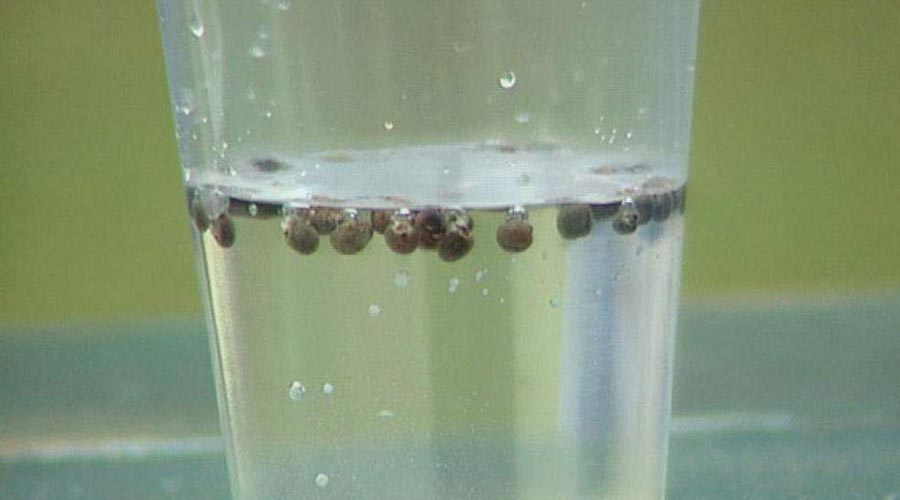
To pop seeds with water, you’ll fill a glass up with tap water, taking care to make sure it stays situated at around 65 degrees Fahrenheit. Drop 2-3 seeds directly into the cup and move them to a cool, dark place. The water helps the seeds soak up all the moisture they need to sprout immediately, helping the shell to soften and crack and the root to emerge in as few as two days.
Some seeds may take longer to germinate, and if that’s the case, just make sure you swap out your water every two days to prevent it from growing germs that could make your plant sick. Once your seed sprouts, remove it from the water and place them into your prepared growing medium. Just take care to handle them very carefully, since they’re extra fragile after they sprout. You can stunt their growth by damaging them as you try to remove them from the cup and transfer them into a pot.
FAQs
Once you have the technique for germinating weed seeds down, you might have a few more questions about caring for them or transplanting them as seedlings. Here are a few answers to the most common questions about germinating cannabis seeds.
Q: How deep should cannabis seeds be planted?
A: As with most seeds, you’ll want to plant your seed at a depth of twice the thickness of the seed. Before they sprout, you’ll only want to mist your seedling cups to prevent the soil from uncovering them. Once they sprout you can add more soil if necessary, but you don’t want to plant too deep. Planting too deep makes it riskier for the seedling, as it could die before it’s able to penetrate the surface of the soil to reach the light.
Q: Do cannabis seeds need darkness to germinate?
A: Yes. Most seeds germinate best in dark conditions. In fact, many plant species, including cannabis, are inhibited by light during the germination process. As soon as they sprout they should be placed under lighting, though. Once the seed is free from its shell, it needs light to photosynthesize and keep growing.
Q: Can you put seeds straight into soil?
A: You sure can! Just make sure that your soil is damp but not soaking wet. It helps to start with smaller pots so that you can more accurately control how much moisture is in the soil while your seeds germinate.
Q: What’s the best temperature and humidity that cannabis seeds should be germinated?
A: The ideal temperature for cannabis seeds to sprout is room temperature, around 68-72°F. As for humidity, the seeds themselves are around 4-12% moisture. To germinate, they should be kept between 25-50% RH. Using a good germination medium like a damp paper towel or potting soil is a good way to keep your seeds at the right temperature and humidity levels.


