


Growing weed outdoors comes with a ton of great benefits. If you’re ready to test out your green thumb, use this handy guide to learn the benefits of outdoor cultivation, how to grow cannabis outdoors, and everything else you need to know before you get started.
Benefits of growing weed outdoors
There’s a lot to love about growing outside. Not only is it an awesome hobby, many growers agree that there’s nothing quite like sun-grown cannabis. We’re breaking down the top four benefits to outdoor grows below.
1. Cheaper than indoor grows
Outdoor grows don’t really need a whole lot, especially compared to how many things you need to run an indoor grow efficiently. All you really need is quality soil, pots, fertilizer, a small greenhouse, and seeds or clones. To run an outdoor grow, all you really need to worry about is water, unless of course you can collect rainwater. Outdoor grows don’t require you to pay for expensive lights or electricity, or other equipment like dehumidifiers and AC units.
2. Higher yields
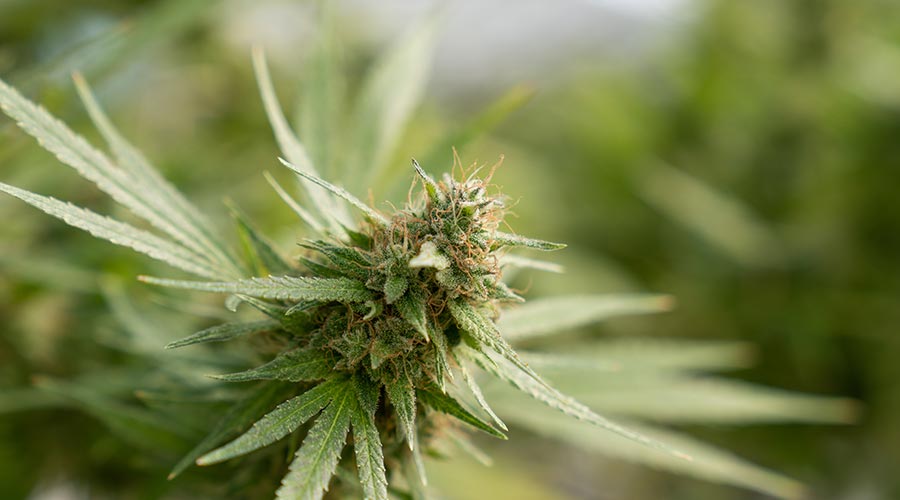
Outdoor plants get massive since they’re not confined to a single room with a low ceiling clearance like indoor plants. In an outdoor grow, you can let your plants get as tall and wide as you want, as long as you can still get in there to trim them and manage them when necessary. That said, one plant can grow as much as a pound of dried bud before harvest.
3. Better for the environment
Indoor grows require a lot to keep them running operationally. They utilize a ton of power to keep fans, lights and air conditioners running. They also require a fair amount of water, especially with certain flood systems or hydroponics grows. But with an outdoor grow, you get the sun, the wind and the rain for free.
4. Great mellow hobby with low maintenance
Gardening is one of the most therapeutic hobbies. An outdoor grow allows you to spend some time outside in the fresh air and work with plants, which evidence suggests are both beneficial to your mental health and wellbeing. Outdoor grows also don’t cause as many headaches as indoor grows since there are fewer moving parts. All you really have to do is trim and water. More importantly, harvesting and smoking the final product feels so much better when you grew it yourself.
How to grow marijuana outside
Growing cannabis outside is pretty straightforward. Follow this step by step guide and you’re well on your way to your first harvest.
1. Choose a good strain.
There are so many different cannabis strains out there. However, some of them perform best in indoor climates. You might want to look for strains that are advertised for outdoor grows. Outdoor strains tend to be more resistant to pests and diseases. More importantly they’re usually more adaptable to less-than-perfect grow conditions.
2. Find the right growing location.
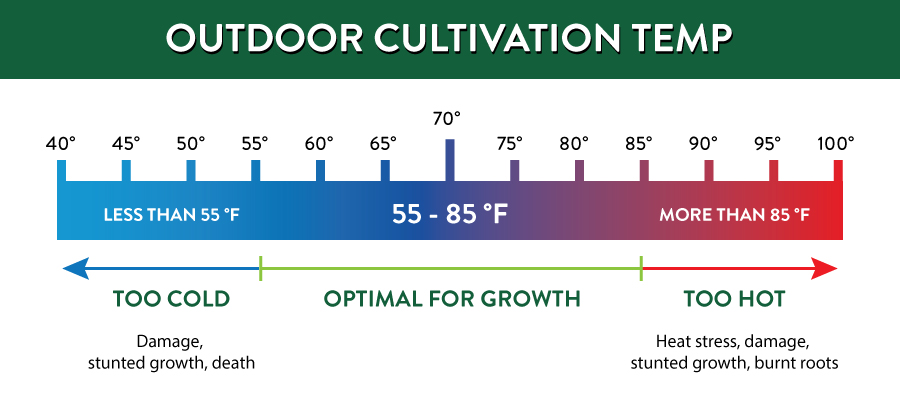
There’s a lot that goes into picking the right place to grow your plants, which we’ve broken down in later sections of this guide. You will need to grow your plants in a climate that stays between 55 – 85°F throughout the growing season. If you’re all good there, you need to find a place to put your plants that is private and secure, but offers plenty of sunlight, a gentle breeze and easy access to water.
3. Choose your soil
There are many different types of soil, which we’ve broken down later in this article. Many premade soils are specially formulated for cannabis plants. But ultimately you need a soil with good drainage, a balanced pH, and nutrients for the plant to use while it grows. If necessary you can amend your soil with compost teas or other organic materials to improve soil fertility and structure.
4. Start your seeds indoors
To get the best possible yield from your plants, you’ll want to start your seeds indoors a few weeks before you take them outside. If you want them to grow as large as possible, the jump start will help them focus the majority of the spring and summer on getting bigger, allowing you to get a higher yield. Start your seeds in small grow cups, and place them in small pots as they get larger. After you start your seeds, you should give them time to display their gender before transplanting. Separate males from females so you don’t transplant a male plant and spend time and resources on it when you will need to cull it later.
5. Transplant the plants outside
After you separate males from females, you can remove your plants from their small pots and plant them in their adult pots in your garden. Starting indoors makes it possible for your plants to reach a suitable size that will prevent transplant shock and weed out any plants that might not survive in the elements
6. Keep your pots wet and fertilize as needed
You should water your plants regularly, taking care to avoid soaking them through. Use a fine mister sprayer instead of a watering can as often as needed to help ensure that water makes its way through the pot slowly so it doesn’t create any pockets of soil that will become hydrophobic. Look out for signs of overwatering, like droopy leaves or pale coloration. Your leaves will tell you a lot about what nutrients your plants might be missing, so use a troubleshooting guide if you need to fertilize.
7. Prune and train
Pruning is vital to cannabis plant health. By removing leaves, you can encourage your plant to grow more and get larger. Pruning also helps prevent leaves from covering flower nodes, allowing you to get bigger flowers and higher yields. However, if you have limited space you should also train your plants to form a canopy. This ensures that every flower node gets ample light without overcrowding the neighboring plants
8. Watch for pests and diseases
You’ll want to be in your garden regularly to inspect each of your plants carefully for common pests and diseases as well as mold or mildew. By catching symptoms of disease, pests, or mold early, you can save your crop by treating the infected plant or removing it from your garden entirely.
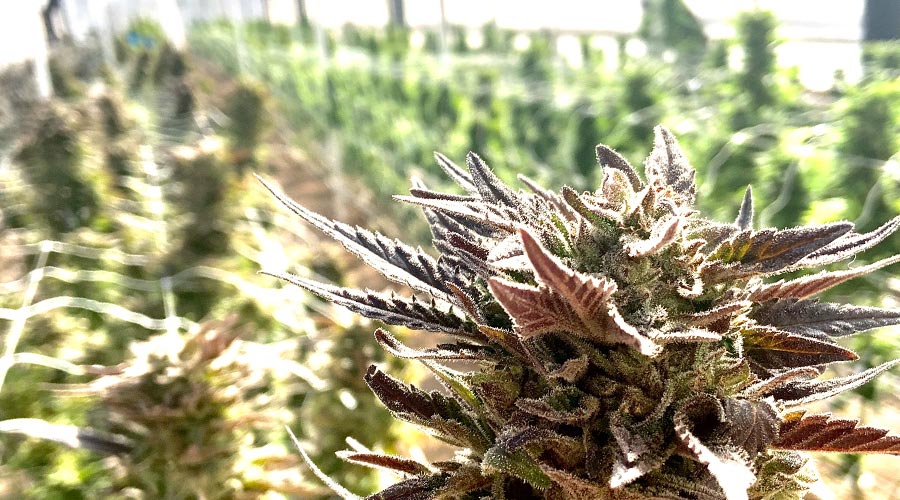
9. Harvest, dry, and cure
In the fall, it’s time to harvest. Monitor the trichomes on your flowers for color changes. When they’re milky white and amber in color, they’re ready to harvest. Cut the branches down and hang them up to dry for a week or two in an enclosed space with plenty of ventilation and humidity. From there you can remove the leaves and trim the buds for the curing process, which involves placing the flowers in jars, burping them daily, and moving them around until they’re dry and sticky.
10. Enjoy the fruits of your labor
After your buds are dried and cured, you can smoke them like you normally would. Notice how they taste and smell, and use that to learn what you could’ve done better next time, if anything at all.
When is the best time to plant cannabis outdoors?
If you live in the northern hemisphere, you’ll take your plants outside in April or May depending on your climate zone. For example, you might be able to plant earlier in southern California than you would in Washington. Seasons in the southern hemisphere are flipped, though. Cannabis is planted in the October or November down there.
Before you start an outdoor grow, it helps to germinate seeds indoors and allow seedlings to grow several weeks before it’s time to plant them outside. Growing them in a controlled environment before taking them outside ensures your plants will be able to spend more time growing when you move them outside and makes sure that they won’t experience too much transplant shock when spring comes. Getting a jump start can also make it easier to separate male and female plants so that you don’t waste time or effort on planting males in your garden only to have to remove them later.
How long does it take to grow weed outdoors?
A lot of different factors affect how long it takes to grow weed outside, including the climate, growing conditions and the genetics of the strain you’re growing. As a general ballpark estimate, cannabis plants grown outdoors will take 3-4 months to reach maturity.
In temperate climates that have long, warm summers, plants will usually be planted in the spring and harvested in the fall. The plants in these zones typically reach maturity in late summer or early fall. However, tropical climates that are consistently warm are great for cannabis since the environment allows them to mature more quickly. More importantly, tropical environments allow plants to be grown year round.
Climate aside though, the strain your growing and your skill level also play a role in the time it takes to grow weed outside. Some strains are bred specifically to be grown outdoors, so they may mature faster or slower than others. Your growing conditions will also influence the time it takes. Soil quality, sun exposure, access to water, and exposure to the elements all affect how fast or slow your outdoor plants will mature.
Understanding the impact of your climate
Even though cannabis can adapt to lots of different conditions, it’s still susceptible to problems in extreme weather. Heavy rain, excessive wind, or hail can physically damage your plants which will hurt your yields or leave your plant vulnerable to mild, mildew, or pests. However, temperature also plays a vital role in your success. If temperatures are above 85°F for too long, it will stunt your plants and prevent them from growing. On the other end of the spectrum, temperatures below 55 °F can kill them.
Cannabis plants prefer temperate climates, so temperatures need to stay consistently between 60 – 85°F for optimal growth. Under 50°F and your plants can freeze, get stunted, or die. Keep in mind that the 75 – 85 °F range is at the high end of the hot climate. Above 85 °F and your plants may wither or get stunted in attempts to preserve water. In high temperatures, cannabis will need more water than usual.
Choosing an outdoor growing location
Before you even think about starting your seeds, you’ll want to consider the climate in your area and the makings of a good garden spot.
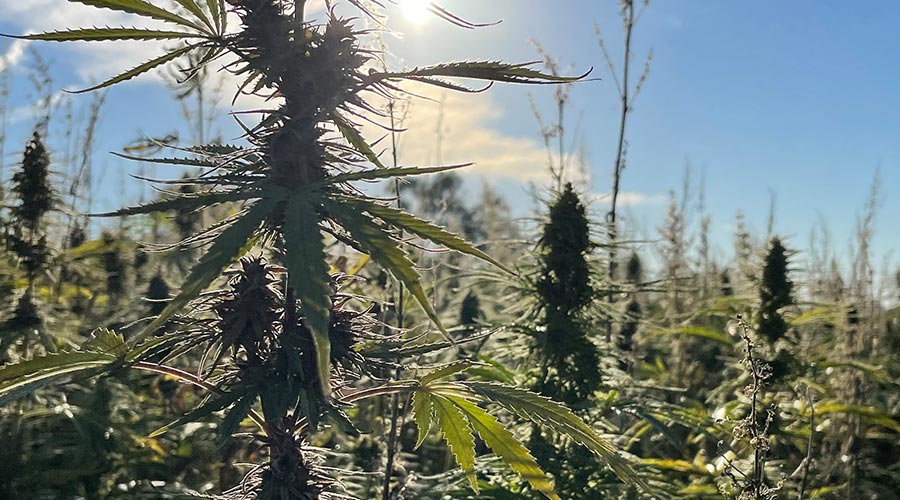
Your outdoor grow will need to provide ample sunlight for at least 6 hours of full sun every day. If your backyard is shady or your garden spot won’t get full, direct sunlight for most of the day, it’s not an ideal growing location. Cannabis needs a lot of direct sun, ideally around midday when the sun’s rays are their strongest.
Your garden should also have a light breeze, especially if you live somewhere hot. However, too much wind can be a bad thing. You might need to erect windbreakers, like walls or fences or other shrubbery to protect your plants from too much wind. Additionally, if there’s not enough of a breeze in your area, you may want to utilize fans or choose a different place to garden.
The last thing you want to consider is privacy. In many places, it’s illegal to grow weed where other people can see it or in unsecure areas that children could find their way into. Tall fences and shrubs or trees surrounding your garden all help to conceal your cannabis plants. However, you should also consider security measures, like a padlock, to deter potential thieves.
As long as you have your boxes checked in the category above, you can start thinking about different options for locations. Many people will use yards and greenhouses, though other growers may utilize container gardens concealed from view on balconies or rooftops. Regardless of what you choose, think carefully about how large you want your plants to be. In wide open spaces, cannabis plants can grow 10 feet or more in height.
Choosing the best soil for outdoor cannabis growing
For newbie growers, we recommend buying a high-quality potting soil designed to provide your plants with the nutrients they need so you don’t have to worry about amendments or fertilizers. Pre-fertilized soil, also known as “super-soil”, can grow your plants from seed to harvest without having to do much of anything except water.
You can make it yourself by combining good soil with things like worm castings, bat guano, and other components and allowing it to sit and mingle for a few weeks, but it might be much easier to buy it from a nursery or grow shop. There are a lot of options out there, so start with a soil type which we’ve broken down below. You can then look at nutrients, microorganisms, and other amendments that improve the soil.
You might find soils with things like perlite, biochar, peat moss, compost, fish or bone meal, glacier rock dust, or plant food. But good amended soils will break down all of the organic nutrients they contain so you can decide if you want to add anything yourself.
Types of soil
Clay
Clay soils are great for native plants, but cannabis plants don’t do too well in them. Their small granular feel packs in tightly for a dense, hard-to-work soil, causing them to drain very slowly and not hold oxygen well. Clay soils will need to be amended heavily before you can put plants in them. Compost, manure, worm castings, and decomposed plant matter will need to be added to provide aeration and drainage and provide nutrients for the plants and to combat clay soil’s high pH. However, clay soils provide minerals and hold water exceptionally well, which can help stabilize plants.
Sand
Sandy soils have a low pH and are easy to work with because of their large granules, which allow it to drain well, prevent compaction, and provide oxygen. However, they dry out insanely quickly and nutrients get washed away. Sandy soils are ideal for things like cacti and succulents, but will need to be heavily amended for cannabis. Compost, peat moss, and coco coir help bind the soil together. However, in warm climates, sandy soils need to be mulched to protect the roots from getting too hot.
Silt
Silty soil is ideal for cannabis plants since it retains water and warmth, offers good drainage, and contains plenty of nutrients that your plants need. It has a balanced pH and a medium granular size which may compact and harm drainage. Silt soil with loam is best for cannabis plants since it’s fertile and doesn’t need much amending. The loam takes away the few issues with other silt soils, like poor drainage and compaction problems.
Loam
Loam is a mixture of clay, sand, and silt soils that smells rich and alive, and cannabis plants thrive in it. Loam soil is dark, hearty, and super easy to work. It has a neutral pH and offers excellent water and nutrient retention and drainage. It’s also naturally fertile, so it supports microorganisms with high oxygen levels. Most potting soils used for gardening are loam soils, which form a loose ball that holds its structure before breaking into large chunks if you squeeze them.
In conclusion, growing weed outdoors can be an incredibly fun and rewarding experience, but it’s important to know what you’re doing if you want to get the most from your garden. By following the tips outlined above, you can become an outdoor grow pro and enjoy the many benefits of growing your own cannabis. Whether you’re looking to save money, reduce your carbon footprint, or simply enjoy the process of growing your own plants, there’s no denying that outdoor growing can be an incredibly fulfilling hobby. With a little bit of patience, dedication, and knowledge, you can create a thriving garden full of healthy, happy cannabis plants that will provide you with an abundant harvest for years to come.


