


Now that we’re well-involved in the fall season, it’s time to get festive. Instead of going the traditional pumpkin-spice-everything route, why not try something a little more aligned with you and your interests? Here’s how to make a bong out of a pumpkin using things you probably already have around the house in 8 easy steps.
What you need to make a pumpkin bong
To get started, you’ll need a few supplies.
- A good sized pumpkin (smaller ones are great for pipes!)
- A sharpie marker
- A glass downstem (glass is best, but you can even use a piece of PVC pipe or any other tube)
- A bowl piece (glass is best, but you can make your own out of things like foil)
- A mouthpiece for the bong (Again, glass from a broken bong is best, but you can also use PVC)
- A knife and other carving tools
- Spoon for pumpkin guts
How to make a pumpkin bong
Once you have all of your other materials, it’s time to hunt for the perfect pumpkin. Here are 8 simple steps for making a pumpkin bong.
Step 1: Find a good pumpkin
Smaller pumpkins work the best for a pumpkin bong. You have to look at your pumpkin like you would look at a piece of glass. If it’s too big, it’ll be difficult to hit and will be a waste of your time and effort. Go for a small to medium sized pumpkin, and choose one that’s more tall than round. You need it to comfortably fit your mouthpiece and downstem, so make sure the pumpkin you choose is the right size for the other materials you chose to make your pumpkin bong.
Step 2: Mark holes for the mouthpiece and downstem
Just like back in shop class, measure twice and only cut once. You’ll want to avoid improvising since you can either cut too much to create proper suction, or you’ll end up with something janky and unusable.
Use your downstem to trace the hole you want to make in your pumpkin with your sharpie marker. Use the thicker part of the downstem, since you want it to fit snugly inside the pumpkin. Make sure to place it on the lower side of your pumpkin. It should fit in there at a 45 degree angle toward the bottom of the pumpkin.
From there, you can add in your mouthpiece. You can place it on the top of the pumpkin or on the side of the pumpkin near the top depending on how you prefer to smoke it. Use the mouthpiece to trace the hole.
After that, you’ll draw a hole big enough for you to fit both hands into the pumpkin to clean the guts out. The hole shouldn’t be too wide to interfere with the downstem or the mouthpiece holes and should still seal tightly. This is why we recommend placing this hole at the top for easy access and putting the mouthpiece on the side of the pumpkin.
Step 3: Cut off the top of the pumpkin
With a very sharp blade, cut the top of the pumpkin in a circle and take great care to keep the piece intact. You’ll need it to seal the bong completely when you’re done cleaning it and ready to use it. Be sure to clean pumpkin guts off of this piece, too! Avoid slicing the downstem and mouthpiece area for now.
Step 4: Clean out the pumpkin guts
Just like carving a jack o lantern, you’ll first start by cleaning out the inside of the pumpkin. After you remove the top, you can use your hands or a spoon to remove the seeds and meat of the pumpkin. The spoon will also chisel away any obstructions and leave the pumpkin hollowed out. When you’re done cleaning it, give it a final rinse with water and place the top back on.
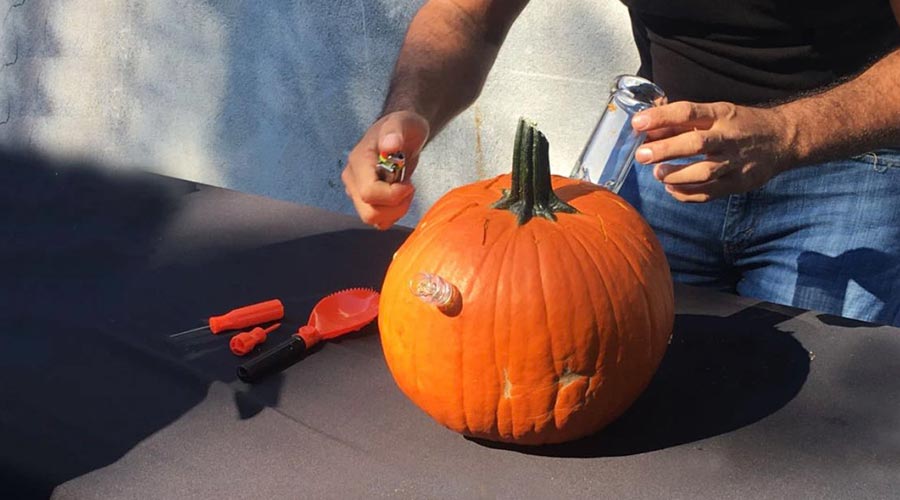
Step 5: Install the downstem and bowl
Think of this step like pumpkin surgery. You need to be very careful here to carve out the holes you designated in step two. If you cut your holes too large or incorrectly, you’ll have an airflow problem or a splash-back problem. Cut the lower portion of the hole at a 45 degree angle using a very sharp knife and then slide the downstem into the hole. The angle will keep the downstem pointing downward and fitting snugly in your pumpkin. After the downstem is installed, you can slide the bowl into the downstem. If you prefer to dab, you can slide a titanium nail into the downstem instead.
Step 6: Install the mouthpiece
Carve out the mouthpiece hole using a sharp knife and then slide the mouthpiece inside the hole. If you’re using something smaller, like a piece of PVC pipe or a straw, use a screwdriver to stab a smaller hole into the pumpkin. Remember, you can always cut more, but you can’t cut less after you’ve made a cut!
Step 7: Add water or hit it dry
You can make your pumpkin bong an official bong or dab rig by adding a little bit of water to the bottom of the pumpkin. This will allow you to cool your smoke and enjoy a smoother flavor. However, you should avoid using water if you just want to use it like a bowl.
Step 8: Decorate your pumpkin and enjoy!
First off, don’t carve your pumpkin bong like a regular jack o lantern. The smoke will escape and you’ll have terrible airflow, and all of this will have been for nothing. However, feel free to give the pumpkin some flair using paint, markers, stickers, or anything else you might have on hand for self expression. After that, just pack your bowl as normal and blaze! Enjoy it!
Pumpkin Bong Aftercare
You can smoke out of your pumpkin bong as much as you’d like, but be sure to empty the water out of it after every use. Also, like all fruits and vegetables, pumpkins will eventually begin to rot. When it starts smelling musty, it’s time to get rid of it. While there are some things you can do to preserve your pumpkin, we’d suggest avoiding it. All good things must come to an end, and when it’s time to retire your pumpkin bong, give it back to nature. Squirrels, deer, worms, and other critters will eat it and it’ll become a part of the circle of life.
Until then, enjoy it and show it off!
—


